Setting up your MUD
Step 1: Prepare the code
The following code performs initializes and starts a MUD instance that accepts connections on port 4000.
MUDConnector telnet = TelnetConnector.builder()
				.setPort(4000)
				.build();
MUD mud = MUD.builder()
				.setName("Example MUD")
				.setHostName("example.mud.com")
				.setStaticDataDir(Path.of("/home/mud/static"))
				.setDynamicDataDir(Path.of("/home/mud/dynamic"))
				.addConnector(telnet)
    			.setTileGraphicService(new JavaFXTileGraphicLoader())
				.build();
mud.start();
It expects a directory structure like this
/static
	/audio
	/symbols
		SymbolSet_<num>.xml
		<Spritesheet.png>
	/world
		<world-id>
			<zone-number>
				rooms.xml
				items.xml
				mobiles.xml
				<mapfile>.tmx
/dynamic
	accounts.json
	/characters
		<charname>.cha
		<charname>.json
		...
Step 2: Tiles and symbols
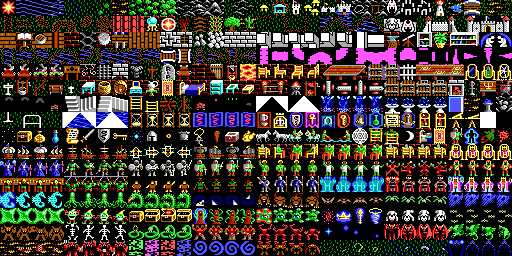
Find or create one or more tilesets that suit your game and have them organized as a spritesheet. It is recommended that your tiles are at least 16x16 pixel, but 32x32 might be better.

The tiles are numbered from left-right and top-down, starting with 0.
To tell the engine how to treat each tile, you need to create a SymbolSet_<num>.xml file in your "symbols" directory. For each tile you need to create a <symbol> element in which you define the visual representation in ASCII, CP437 and Unicode, as well as fore- and background color. You can also assign a name and add flags associated with that symbol.
<?xml version="1.0" encoding="UTF-8" standalone="yes"?>
<symbolset nr="4" tilesize="16" title="Ultima Vb">
   <imageFile>Ultima5_Tiles.png</imageFile>
   <symbols>
      <symbol id="0" title="Explosion">
         <fore ansi="9"/>
         <back/>
         <text ascii="*"/>
         <image/>
      </symbol>
      ...
      <symbol id="46" title="Tree">
         <flag>BLOCK_MOVEMENT</flag>
         <fore ansi="2" c256="2"/>
         <back ansi="10" c256="10"/>
         <text ascii="*" cp437="↑"/>
      </symbol>
      ...
   </symbols>
</symbolset>
In the example above, the tile 46 is shown as a green asterisk in ASCII or a green arrow up in Codepage 437. It also is marked as to block movement.
Step 3: Create a map
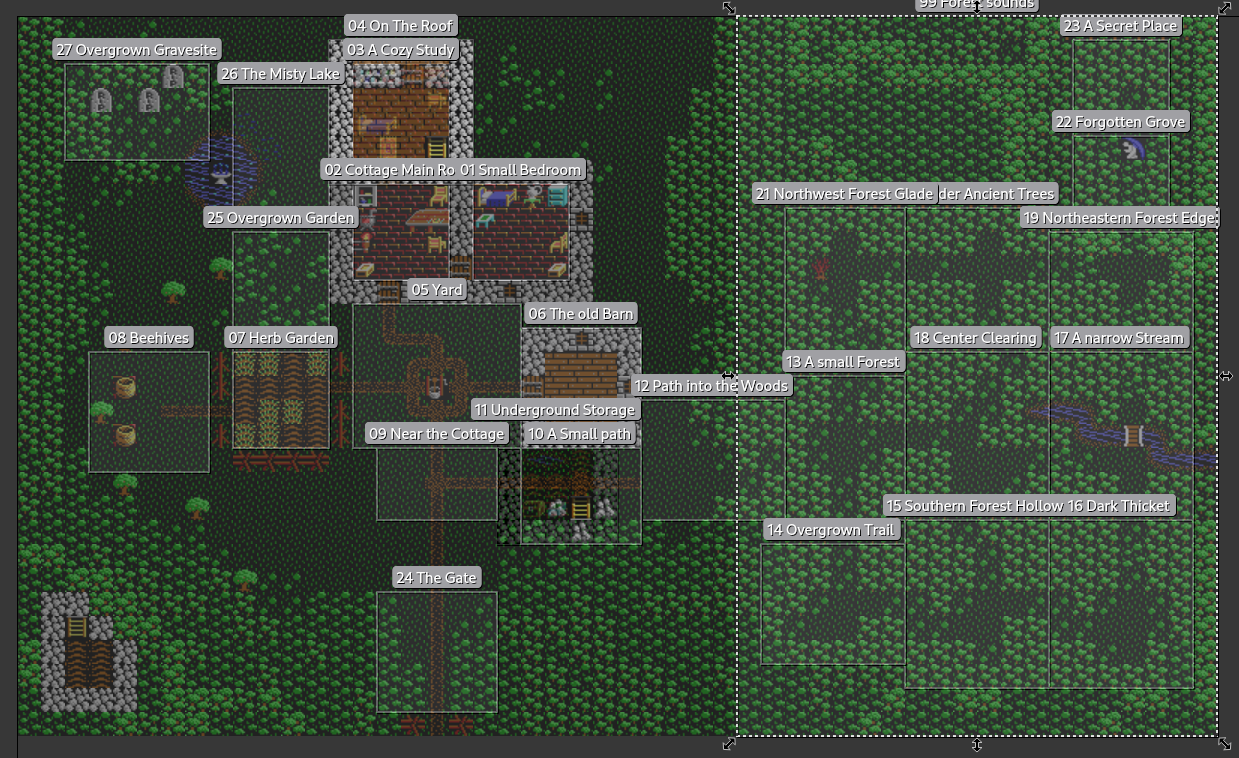
In a GraphicMUD project, every zone needs to be accompanied by a 2D map file. This files must be created by a suitable application and being imported by the GraphicMUD framework - for the time being the only support tilemap tools is Tiled and its exported TMX map format.

The TMX format allows creating area objects and assigning names - make sure that those names start with room numbers, like "02 My room"
[!IMPORTANT]
Area objects in a map can overlap and not every tile belongs to an area object, so a specific 2D coordinate can have 0..* locations assigned to it.
Step 4: Write a zone
A zonefile (rooms.xml) is an XML file that
- is connected to a map file (Startzone.tmx in this example)
- is a collection of "locations" - most of which are usually rooms.
<?xml version="1.0" encoding="UTF-8"?>
<zone nr="1">
    <title>Forest Enclave</title>
    <descr>A newbie starter zone</descr>
	<mapfile format="tmx">Startzone.tmx</mapfile>

    <locations>
        ...
		<location nr="2">
            <descr>This is the main room of the cottage. A rustic wooden table stands in the center of the room, with simple ceramic bowls and a basket full of apples on top. A cast-iron pot hangs above steam powered fireplace. From the pot comes a wonderful odor from a quietly simmering soup.
            </descr>
            <room>
                <title>The Cottage's Main Room</title>
                <exitlist>
                    <exit target="1" dir="e">
                        <descr>Your bedroom and study.</descr>
                    </exit>
                    <exit target="5" dir="s">
                        <descr>Through the small window in the door you can see the yard with the well.</descr>
                        <door>
                            <rpg>{"difficulty": 20}</rpg>
                        </door>
                    </exit>
                </exitlist>
            </room>
            <loadlist>
                <load type="MOBILE" ref="mouse"/>
            </loadlist>
        </location>
        ...
        <location nr="99">
            <audio file="audio/Forest1.mp3" loop="true" volume="100"/>
        </location>
    </locations>
</zone>
When a zone is loaded, each location in the XML is connected to a 2D area on the tilemap. This connection is done automatically using the location number.